Current DC Lab Infrastructure with PFsense
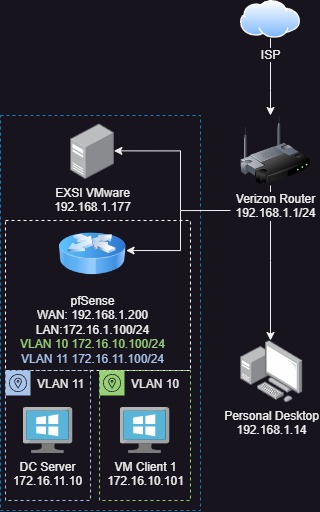
VMWare EXXi Requirements
First we need two virtual switches for Internal and External communications.
Networking -> Virtual Switch -> Add standard virtual switch
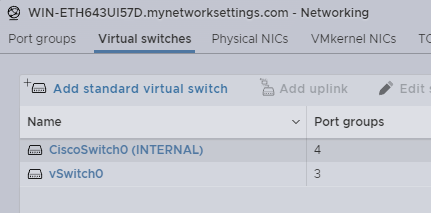
Create the proper Port Groups for each of the VLAN network like below. Later they will be used to connect the VMs.
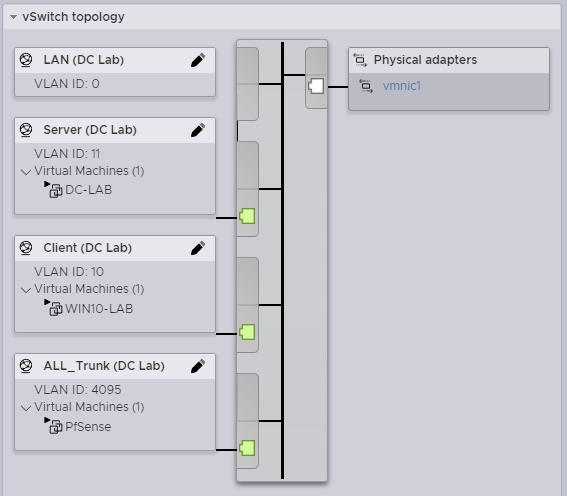

| Port Groups | VLAN ID |
|---|---|
| LAN (Internal) | 0 |
| Server (Internal) | 11 |
| Client (Internal) | 10 |
| ALL_Trunk (Internal) | 4096 |
| ISP (External) | 0 |

PfSense Requirements
Create a Pfsense VM and add these networks
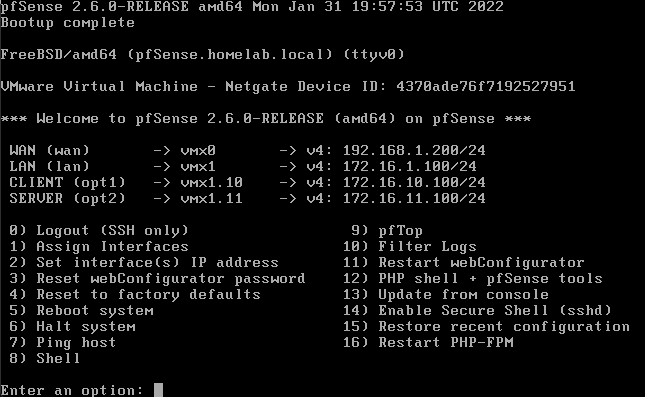
Create Interface Assignments and enable DHCP on all of the Interfaces. Later we will make it also assign the DC’s as the DNS resolver.
| Network | Address | DNS |
|---|---|---|
| WAN | 192.168.1.200/24 | DHCP (Default) |
| LAN | 172.16.1.100/24 | Router (Default) |
| CLIENT | 172.16.10.100/24 | 172.16.1.10 (AD-DC) |
| SERVER | 72.16. 11.100/24 | Router (Default) |
Create Alliases
IP Address Alias For range of private IP address also known as RFC1918. This will make creating firewall rules a lot simpler to achieve network isolation.
Firewall -> Aliases -> IP Add -> Name: RFC1918
IP CIDR 192.168.0.0 16 172.16.0.0 12 10.0.0.0 8
I want to have the most control over what is allowed so instead of using the allow all rule I disabled it and specifief spcific ports needed for basic internet browsing. Create an allise for ports used.
Firewall -> Alliases -> Ports Add
Port Description 80 HTTP 443 HTTPS 8080 ALT/HTTPS 53 DNS
Windows Server Requirements
In this lab I’m just using the 2016 version of Windows Server. So as long as you have an ISO uploaded to your datastore, you can provision a new server to begin to configure. First we need a static Ip Address so use these settings on the adapter.
| Network Adapter | Address |
|---|---|
| IP Address | 172.16.11.10 |
| Subnet mask | 255.255.255.0 |
| Default gateway | 172.16.11.100 |
| DNS1 | 127.0.0.1 |
Configure Windows 2016 Server Roles
- Add Active Directory Domain Service
Name:
homelab.local - Add DNS Server
DNS Forwarder configured to send DNS request from the Pfsense Router.
Set-DnsServerForwarder -IPAddress "172.168.11.100"
| Image | Description |
|---|---|
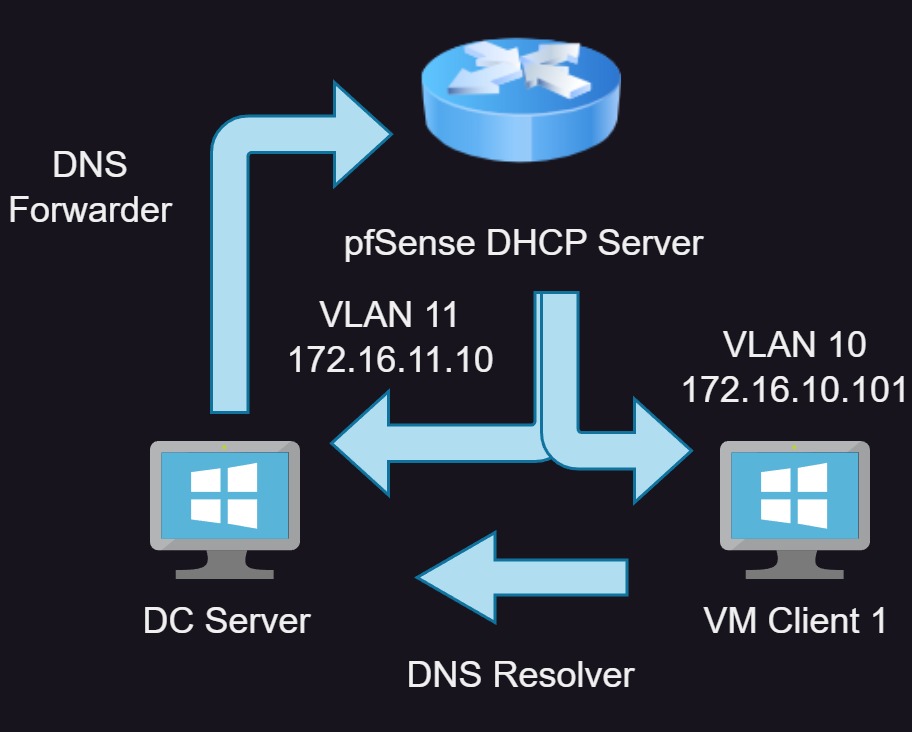 |
So the way it work is The Router is in charge of handing out DHCP addresses and the Domain Controller is in charge of resolving IP Addresses for the Client interface. At the samee time using the pfSense router as a DNS forwarde |
PfSense Firewall Rules
Im allowing the client to connect to the domain controller and allowing the server to communicate to the whole client network.
Client VLAN Firewall Rules
| State | Protocol | Source | Port | Destination | Port | Description |
|---|---|---|---|---|---|---|
| Allow | IPv4 ICMP | CLIENT net | * | * | * | Allow Ping |
| Allow | IPv4 TCP/UDP | CLIENT net | * | * | Browsing | Allow Internet Browsing |
| Allow | IPv4* | CLIENT net | * | 172.16.11.10 | * | Domain Controller Access |
| Block | IPv4* | CLIENT net | * | RFC1918 | * | Block RFC1918 |
Server VLAN Firewall Rules
| State | Protocol | Source | Port | Destination | Port | Description |
|---|---|---|---|---|---|---|
| Allow | IPv4 ICMP | SERVER net | * | * | * | Allow Ping |
| Allow | IPv4 TCP/UDP | SERVER net | * | * | Browsing | Allow Internet Browsing |
| Allow | IPv4* | SERVER net | * | CLIENT net | * | Client Network Access |
| Block | IPv4* | SERVER net | * | RFC1918 | * | Block RFC1918 |
Windows Client Requirements
This machine wont need much configuration other then joining it to the domain. After that to test a login using a domaina account.